I keep a large bag of small scraps., principally offcuts from projects. When I’m clearing up after finishing something, anything worth keeping goes into the large clear plastic bag on the floor beside my sewing table. The bag being clear helps, just a little, when I’m looking for something in particular, as I was this morning. I needed more earthy colours to add more shapes to the current Bungle Bungles piece I’m working on, you may remember.

Relatively speaking, piecing like this uses as much fabric in seams as shows on the front. When I’m doing pieced work, I use a large variety of different fabrics in small amounts; and nothing is cut out in advance, its all cut freehand and sewn seam by seam in the technique known as ‘improvisational piecing’. The Ebb&Flow quilts in particular are assembled in this way with a lot of scrap bag diving along the way –

Needing more of some fabrics including some of those little one-offs that add spice, I took a deep breath and began scrap bag diving – well, turned it all out on my table, and started sorting though, selecting things I can use, and putting most of it back into the bag.


I carefully save all offcuts of every yellow, partly because although I rarely buy any yellow fabric, a touch of a yellow value here and there in every piece of art, whatever the medium, is vital, literally giving life to the work. The more valuable the fabric/colour, the smaller amount I am prepared to save…. and the smallest piece of a strong almost acid yellow I came across this morning was barely 3cm x 1cm!

This piece of yellow with airbrushed red and blue is gradually running out – so its very precious. I have about 3cm x 4cm left of a fat 1/4 bought years ago from Deb Lunn in Denver.
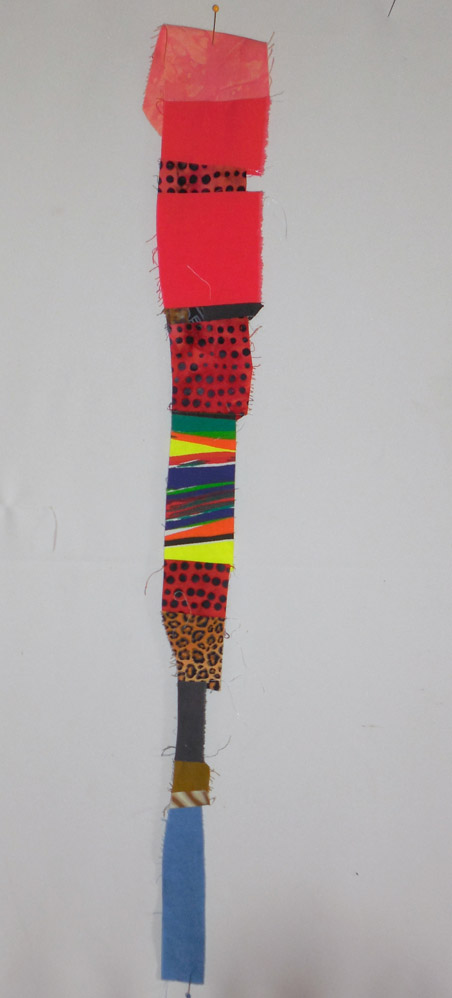
This morning I realised scrap bag diving is rather like archeology, digging down though the past – and like archeology, it throws up some puzzles, of which this is one! I don’t remember putting it together, but these are definitely my fabrics, and all sewn together by me, for sure – but why? I certainly don’t remember anything in which this sequence appeared. It’s a nice yellow in that striped print, though….

I really don’t remember the work these offcuts came from – they were trimmed off after the gold stitching along each place the cream meets the print…. quite elegant, really, and I may do something more in these gentle neutrals soon. With gold stitching/quilting.


I often work in repeat units – and always make a few extra to get the best possible result when juggling them at the assembly stage. From ‘Cynthia’s Quilt’ top, and ‘New Directions’ below, come these ‘spares’ which have useful sized pieces – and the raiding has already begun on the lower ‘block’. The fabric in that block terminating in the triangle/arrow head is destined for salvaging for use in the next set of strip assemblies I need to put together; I only ever had a small amount of it and I’m down to last few square centimetres…

And finally, much to my delight, virtually at the bottom of the heap, I found one of the pressure gloves I’ve been missing for a while, since last spring really….so then I had to tip it all out again and go through more carefully to find the other. And sure enough, it was there. The weather’s getting cool again, and some days now my hands are feeling a bit in need of pressure on the arthritic joints – so this find was timely and welcome!.
Like this:
Like Loading...


